Mastering How to Clean Oil Paintings Safely
how to clean oil paintings

Mastering How to Clean Oil Paintings Safely

Unlock the secrets to safely cleaning and preserving your valuable oil paintings without causing damage.

Start Cleaning Today

Key Takeaways

  • ✓ Always test cleaning solutions on an inconspicuous area first.
  • ✓ Water and mild soap are often sufficient for surface dirt.
  • ✓ Professional conservators are recommended for complex restorations.
  • ✓ Avoid harsh chemicals, abrasives, and excessive moisture.

How It Works

1
Assess the Painting's Condition

Before starting any cleaning, carefully examine the painting for cracks, flaking paint, or previous repairs. This initial assessment guides your cleaning approach and identifies potential risks.

2
Dust and Surface Debris Removal

Begin with a gentle dry cleaning to remove loose dust and superficial grime. This prevents abrasive particles from scratching the surface during wet cleaning stages.

3
Spot Test Cleaning Solutions

Select a small, hidden area of the painting to test any cleaning solution you intend to use. Observe for adverse reactions such as color lifting, dulling, or surface stickiness.

4
Gentle Wet Cleaning Application

Using the tested solution and soft materials, apply the cleaner sparingly and gently. Work in small sections, changing cleaning materials frequently to avoid redepositing dirt.

Understanding the Anatomy of an Oil Painting and Its Vulnerabilities
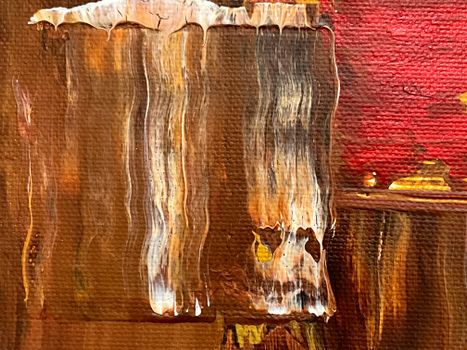
Modern abstract painting featuring textured brush strokes in brown and red hues. Photo: Steve A Johnson / Pexels
Before embarking on the delicate task of learning how to clean oil paintings, it's crucial to understand what you're working with. An oil painting is more than just pigment on canvas; it's a complex, multi-layered structure, each component of which can react differently to environmental factors and cleaning agents. Typically, an oil painting consists of a support (canvas, wood panel, or metal), a ground layer (primer), multiple layers of oil paint, and often a protective varnish. The support provides the structural integrity, but it's susceptible to warping, tears, and insect damage. The ground layer prepares the surface for painting and can become brittle over time. The oil paint itself, composed of pigments suspended in a drying oil, hardens through oxidation, a process that continues for many years. This ongoing chemical change can lead to cracking, particularly if the layers dry at different rates or are subjected to fluctuating humidity and temperature. Finally, the varnish layer, applied years or even decades after the painting is completed, serves as a protective barrier against dirt, pollution, and UV light. It's this varnish layer that often yellows and darkens over time, obscuring the original colors beneath. Understanding these layers helps you identify the source of the dirt or discoloration and choose the appropriate cleaning method. For instance, surface dust and grime mostly affect the varnish layer, while ingrained dirt might penetrate deeper into cracks. Flaking paint is a serious vulnerability, indicating a loss of adhesion between paint layers or between paint and ground. Attempting to clean such an area without stabilization can lead to further paint loss. Environmental factors play a significant role in a painting's degradation. High humidity can cause canvas to slacken and mold to grow, while low humidity can make paint layers brittle. Exposure to direct sunlight or fluctuating temperatures can accelerate cracking and varnish yellowing. Therefore, a painting's environment should always be considered before, during, and after cleaning. Knowing these vulnerabilities underscores the importance of a cautious, informed approach. Every cleaning intervention carries a risk, and the goal is always to minimize that risk while maximizing the benefit to the artwork. This foundational knowledge is your first step towards becoming a responsible steward of valuable artwork, ensuring its longevity for future generations to appreciate. Never underestimate the complexity involved; when in doubt, always seek professional guidance.

Essential Tools and Materials for Safe Oil Painting Cleaning
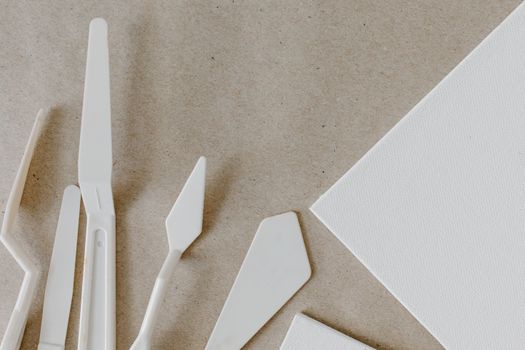
Close-up of plastic palette knives and canvas on a brown background. Photo: Tara Winstead / Pexels
Equipping yourself with the right tools and materials is paramount when learning how to clean oil paintings safely and effectively. Using inappropriate supplies can cause irreversible damage, so invest in quality items specifically designed for art care or those known to be gentle. Your basic toolkit should begin with very soft, natural-bristle brushes – think artist's brushes or large, fluffy cosmetic brushes – ideal for dusting without scratching. Avoid synthetic brushes, as they can be too stiff. For more stubborn dust and debris in crevices, a soft, lint-free cloth, such as microfiber or finely woven cotton, is essential. Always ensure these cloths are clean and free of any residues from detergents or fabric softeners. When it comes to wet cleaning, distilled water is a non-negotiable. Tap water contains minerals and chemicals that can leave deposits or react negatively with the painting's surface over time. For mild surface grime, a very dilute solution of pH-neutral soap (like Orvus WA Paste or a high-quality artist's soap, specifically formulated for conservation) can be considered, but always with extreme caution and after thorough testing. Cotton swabs, particularly medical-grade ones with tightly wound tips, are invaluable for controlled application of cleaning solutions and for working in small, detailed areas. These should be pure cotton and lint-free. Avoid household cotton balls, which can shed fibers. Small, clean containers for mixing solutions and holding distilled water are also necessary. For more advanced cleaning, you might consider conservation-grade solvents, but these should only be used by experienced individuals or under professional guidance due to their potential to damage paint and varnish. Never use household cleaners, furniture polish, or commercial solvents like turpentine, paint thinner, or alcohol, as these are far too aggressive and can strip paint, dissolve varnish, or cause irreversible chemical reactions. Additionally, ensure you have a clean, stable, and well-lit workspace. Good lighting is crucial for identifying dirt and observing your progress without causing damage. Protective gloves (nitrile or latex) are recommended to protect both your hands from potential chemicals and the painting from oils and dirt on your skin. Finally, a magnifying glass can be incredibly useful for examining the painting's surface up close, identifying areas of concern, and monitoring the cleaning process in detail. Remember, the philosophy behind selecting these tools is always gentleness and precision, aiming to remove only the unwanted layers without disturbing the original artwork beneath.

Step-by-Step Guide to Gently Cleaning Surface Dirt and Grime
A woman carefully places a minimalist leaf art piece on a white wall. Photo: Kampus Production / Pexels
Once you've understood the painting's structure and gathered your tools, you're ready to tackle the process of how to clean oil paintings, starting with the most common issue: surface dirt and grime. This step-by-step guide focuses on gentle, non-invasive methods, suitable for most well-preserved paintings. Always work in a well-lit area, preferably with natural light, and ensure your workspace is clean and stable. **Step 1: Initial Dry Dusting.** Begin by carefully removing loose dust from the entire surface of the painting. Use a very soft, clean, natural-bristle brush (like a wide, soft artist's brush or a cosmetic brush). Hold the painting at a slight angle and gently brush downwards, allowing gravity to help dislodge dust. Avoid pressing down or scrubbing. For textured areas or crevices, a soft, dry lint-free cloth can be gently dabbed, not rubbed. This initial dry cleaning is crucial as it prevents abrasive particles from being dragged across the painting during subsequent wet cleaning, which could cause scratches. **Step 2: Micro-Testing with Distilled Water.** Before applying any moisture to the entire painting, conduct a micro-test. Dip a clean cotton swab in distilled water, ensuring it's damp but not dripping. Choose a very small, inconspicuous area, such as a dark edge or a tiny corner that won't be missed. Gently roll the damp swab across this area. Observe the swab for any color transfer from the paint or varnish. If the swab remains clean or shows only faint discoloration from accumulated dirt, it suggests the varnish layer is stable and water-soluble dirt can be carefully removed. If paint color transfers, immediately stop and do not proceed with water-based cleaning. This indicates the paint or varnish is compromised. **Step 3: Gentle Wet Cleaning – The "Roll-and-Lift" Method.** If the water test was successful, proceed with caution. Dip a fresh cotton swab in distilled water, gently squeezing out excess moisture so it's just damp. Using a gentle, rolling motion (the "roll-and-lift" method), clean a small section of the painting. Do not rub back and forth. The rolling motion lifts dirt rather than spreading it. As the swab becomes soiled, discard it and use a fresh one. It's critical to change swabs frequently; otherwise, you're just redepositing dirt. Work in small, manageable sections, observing the painting closely for any changes in color or texture. **Step 4: Drying and Observation.** After cleaning a small section, gently blot the area with a clean, dry, lint-free cloth to remove any residual moisture. Allow the area to air dry completely before moving to an adjacent section. Continuously observe the painting for any adverse reactions like dulling, stickiness, or paint lifting. Patience is key; this process can take a significant amount of time, especially for larger or heavily soiled paintings. If you encounter any resistance, unusual stickiness, or color transfer at any point, stop immediately and seek professional advice. Remember, the goal is to enhance, not harm, the artwork. Protecting your art should always be your top priority. This method is primarily for surface grime and should not be used to remove yellowed varnish, which requires specialized conservation techniques.

Advanced Cleaning Considerations and Common Mistakes to Avoid
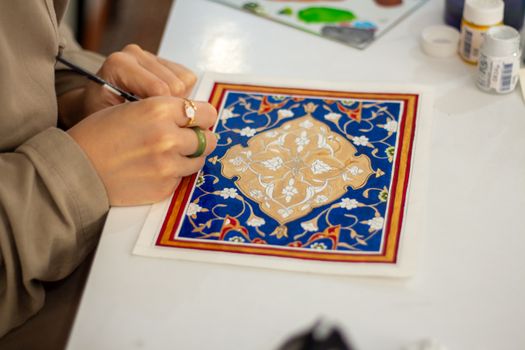
Close-up of an artist working on a traditional geometric design with intricate patterns. Photo: Sedanur Kunuk / Pexels
While basic surface cleaning can often be performed by careful individuals, understanding the limitations and pitfalls is crucial for the long-term preservation of your oil paintings. Advanced cleaning, particularly the removal of old, yellowed varnish, is a complex process that demands professional expertise. Varnish removal involves the use of specific solvents, and the choice of solvent depends on the type of varnish, the age of the painting, and the underlying paint layers. Improper solvent use can dissolve paint, leave residues, or cause irreversible chemical changes. If your painting's colors appear dulled or obscured by a thick, yellow layer, it's a strong indicator that varnish removal might be necessary, but this is unequivocally a job for a trained conservator. They possess the knowledge, specialized tools, and controlled environment to perform such delicate operations safely. Here are some common mistakes to absolutely avoid when attempting to clean oil paintings: * **Using Household Cleaners:** Never, under any circumstances, use household cleaning products like window cleaner, furniture polish, dish soap (unless specifically pH-neutral and conservation-grade), or abrasive cleaners. These products contain harsh chemicals, detergents, and silicones that can permanently damage paint layers, leave residues, or cause irreversible discoloration. * **Rubbing Too Hard or Scrubbing:** Oil paint, especially older paint, can be brittle. Aggressive rubbing or scrubbing can abrade the surface, remove paint, or push dirt deeper into cracks. Always use gentle, controlled motions. * **Using Excessive Moisture:** Water is a solvent, and too much moisture can penetrate cracks, swell the canvas, or loosen paint layers. Always use damp (not wet) materials and ensure thorough drying. * **Ignoring Test Areas:** Skipping the initial spot test is a recipe for disaster. What works on one painting may not work on another due to differences in paint formulation, varnish, or age. * **Attempting Varnish Removal Without Expertise:** As mentioned, this is the most critical mistake. Varnish removal is not a DIY project. The risk of ruining a valuable or cherished artwork is extremely high. * **Using Abrasive Materials:** Sponges with abrasive sides, rough cloths, or paper towels can scratch the delicate surface of an oil painting. * **Cleaning Cracked or Flaking Paint:** If the paint is actively cracking or flaking, any cleaning attempt, even gentle dusting, can exacerbate the problem. Such paintings require stabilization by a conservator before any cleaning can occur. * **Working in Poor Lighting:** Insufficient lighting makes it difficult to see dirt, monitor your progress, and identify potential damage as it occurs. By being aware of these advanced considerations and common pitfalls, you can protect your oil paintings from harm. When in doubt, the safest course of action is always to consult with a professional art conservator.

Comparison

FeatureDIY Surface CleaningProfessional Varnish RemovalFull Restoration
CostLow (materials only)Moderate to HighHigh (significant investment)
Risk of DamageLow (if careful)Very Low (expert)Very Low (expert)
Removes Surface Dirt
Removes Yellowed Varnish
Repairs Cracks/Tears
Requires Expert KnowledgeNo (basic guidance)Yes (highly specialized)Yes (highly specialized)
Time InvestmentHours to a dayWeeks to monthsMonths to a year+

What Readers Say

"This guide on how to clean oil paintings was incredibly thorough. I used the dry dusting and distilled water method on an old family portrait, and the colors instantly looked brighter without any damage. It really empowered me to care for my art."

Eleanor Vance · New York, NY

"As a budding art collector, I was terrified of cleaning my pieces. This article broke down the process beautifully, emphasizing safety. My small landscape painting now looks vibrant again, thanks to the gentle cleaning steps outlined."

Marcus Chen · Los Angeles, CA

"I had a painting with years of kitchen grime on it. Following the advice here, I carefully cleaned a small section with distilled water, and the difference was astounding. The dirt lifted effortlessly without affecting the paint."

Sarah Miller · Austin, TX

"The information on how to clean oil paintings was very helpful, especially the warnings about what not to use. I successfully removed some surface dust, but I appreciate the clear recommendation to seek a conservator for more complex issues like varnish removal, which I'll be doing for another piece."

David Rodriguez · Chicago, IL

"I inherited several oil paintings, some quite old. This guide was a godsend. The detailed steps and emphasis on testing gave me the confidence to gently clean the less fragile ones, revealing their original beauty. Truly an invaluable resource."

Grace Lee · Seattle, WA

Frequently Asked Questions

What is the safest way to clean an old oil painting?

The safest way to clean an old oil painting yourself is by first performing a gentle dry dusting with a very soft brush, followed by a careful spot test using distilled water on a cotton swab in an inconspicuous area. If no paint color transfers, you can proceed with very light, damp (not wet) cotton swabs using a rolling motion to lift surface grime. Always prioritize minimal intervention and consult a professional for significant discoloration or damage.

Can I use Windex or other household cleaners on my oil painting?

Absolutely not. Using Windex or any other household cleaner on an oil painting is highly discouraged and can cause irreversible damage. These products contain harsh chemicals, ammonia, and detergents that can strip the varnish, dissolve paint, leave sticky residues, or cause discoloration and cracking over time. Always stick to conservation-approved methods and materials.

How do I remove yellowed varnish from an oil painting?

Removing yellowed varnish from an oil painting is a highly specialized task that should only be undertaken by a professional art conservator. It involves identifying the type of varnish, selecting appropriate solvents, and carefully dissolving the old layer without damaging the underlying paint. Attempting this yourself can easily lead to permanent damage to your artwork.

Is professional oil painting cleaning expensive?

The cost of professional oil painting cleaning varies significantly based on the size, age, condition, and complexity of the restoration needed. Simple surface cleaning might be less costly, while varnish removal, crack repair, or canvas relining can be a substantial investment. While it can be expensive, it often represents the best value for preserving valuable or cherished artwork for future generations.

What is the difference between cleaning and restoration?

Cleaning an oil painting typically refers to the removal of surface dirt, grime, and sometimes discolored varnish to reveal the original colors. Restoration, on the other hand, is a broader term that encompasses cleaning but also includes repairing physical damage such as tears, holes, flaking paint, or structural issues with the canvas or panel. Restoration aims to return the painting to a stable and aesthetically pleasing condition, often involving inpainting or consolidation.

Who should clean my valuable or antique oil paintings?

For valuable, antique, or significantly damaged oil paintings, it is strongly recommended to consult and hire a professional art conservator. These experts have extensive training, specialized tools, and the necessary knowledge of art history, chemistry, and conservation ethics to treat artworks safely and effectively, minimizing the risk of damage.

Are there any risks associated with cleaning oil paintings myself?

Yes, there are significant risks associated with cleaning oil paintings yourself. These include accidentally removing paint, scratching the surface, causing irreversible chemical reactions with inappropriate cleaners, damaging the varnish layer, or exacerbating existing structural problems like flaking paint. Always proceed with extreme caution, prioritize gentle methods, and know when to seek professional help.

What are future trends in oil painting conservation?

Future trends in oil painting conservation are leaning towards even less invasive techniques, the development of more targeted and safer solvents (often gel-based or micro-emulsions), and the increasing use of advanced imaging technologies (like multispectral imaging) to understand paint layers and degradation processes without physical intervention. There's also a growing focus on preventative conservation, emphasizing environmental control to slow down deterioration.

Armed with this comprehensive guide on how to clean oil paintings, you're now better equipped to care for your cherished artworks. Remember, patience, gentleness, and knowing when to call a professional are your greatest assets in preserving these beautiful creations for years to come. Take the first step towards revitalizing your collection today.

Topics: how to clean oil paintingsrestore oil paintingoil painting conservationcleaning old oil paintingsart restoration techniques
Leo List

IE Escorts NO Escorts US Escorts NZ Escorts AU Escorts
Brampton weed
Adultwork EstrelaBet Vai de Bet R7 Bet Betão Galera Bet Rainbet Bet9ja Shop SportyBet BetKing Sisal Loto Foot Hollywoodbets YesPlay Odibets RushBet Jugabet BetWarrior BetCity MSport betPawa Fortebet