✓ Always test cleaning solutions on an inconspicuous area first.
✓ Professional conservators use specialized solvents and techniques.
✓ Dust and surface grime are the most common issues for oil paintings.
✓ Never use harsh household cleaners or abrasives on artworks.
How It Works
1
Assess the Painting's Condition
Before any cleaning, carefully examine the painting for cracks, flaking paint, or previous repairs. This assessment guides your approach and identifies potential risks.
2
Perform Surface Dust Removal
Gently remove loose dust and superficial grime using a soft, dry brush or a very light vacuum with a protective screen. This prevents abrasive damage during wet cleaning.
3
Spot Test Cleaning Agents
On a hidden edge or area, apply your chosen cleaning solution sparingly to ensure it doesn't damage the paint layer or varnish. Observe for any discoloration or softening.
4
Apply Cleaning Solution Carefully
Using cotton swabs or soft cloths, work in small sections, applying the solution gently and removing dissolved grime. Rinse immediately with distilled water on a fresh swab to neutralize.
Understanding the Anatomy of an Oil Painting
Photo: Steve A Johnson / Pexels
Before embarking on the delicate task of cleaning, it's crucial to understand the layers that constitute an oil painting. This knowledge is your first line of defense against accidental damage. Typically, an oil painting consists of a support (canvas, wood panel, or copper), a ground layer (gesso), the paint layers themselves, and often, a final varnish layer. Each layer plays a critical role, and each can react differently to cleaning agents. The support provides structural integrity; the ground layer creates a stable, non-absorbent surface for the paint. The paint layers, composed of pigments suspended in an oil binder, are the heart of the artwork, and their chemical composition can vary widely depending on the artist's era and materials. Finally, the varnish layer, applied years or even decades after the painting is complete, serves multiple functions: it saturates colors, provides a uniform sheen, and most importantly, acts as a protective barrier against environmental pollutants, UV light, and physical abrasion.
Over time, this varnish layer can yellow, become cloudy, or accumulate dirt and grime, obscuring the original vibrancy of the painting. Understanding these layers helps you differentiate between surface dirt on the varnish and actual deterioration of the paint. For instance, removing a yellowed varnish is a highly specialized task best left to professional conservators, as it requires specific solvents that can easily damage the underlying paint. Simple dusting, however, targets only the outermost grime. The age of a painting also dictates the approach; very old paintings may have brittle paint or multiple layers of historical varnishes that require extreme caution. Always assume fragility and proceed with the utmost care, acknowledging that each painting is a unique artifact with its own history and vulnerabilities. For more insights into preserving artistic creations, explore our guide on art conservation best practices.
Initial Steps: Assessment and Dry Cleaning Techniques
Photo: Tima Miroshnichenko / Pexels
The journey of how to clean oil paintings begins with a thorough assessment and dry cleaning. Never jump straight to wet methods. First, find a well-lit, clean, and stable workspace. Lay the painting flat on a clean, soft surface to prevent accidental damage. Begin by visually inspecting the entire surface of the artwork. Look for any signs of instability: flaking paint, cracks (craquelure), tears in the canvas, or areas where the paint appears to be lifting from the support. If you observe any of these issues, cease all cleaning efforts immediately and consult a professional art conservator. Attempting to clean an unstable painting can lead to irreversible damage.
Once you’ve confirmed the painting’s structural integrity, the next step is dry cleaning – removing loose dust and superficial grime. This is the safest and often most effective initial cleaning method. Use a very soft, natural-bristle brush (like a large, clean watercolor brush or a soft cosmetic brush) to gently sweep dust from the surface. Always brush lightly, in one direction, and never apply pressure. For more stubborn dust or cobwebs, a small, handheld vacuum cleaner can be used, but with extreme caution. Crucially, never let the vacuum nozzle touch the painting. Instead, hold it a few inches away and place a fine mesh screen (like a piece of cheesecloth or window screen) over the painting to prevent accidental suction of loose paint fragments. Static electricity can also attract dust, so consider using a soft, lint-free cloth that has been very slightly dampened with distilled water, but only for the frame or non-painted edges, never the painted surface itself. Remember, the goal here is to remove surface contaminants without introducing moisture or abrasion that could harm the delicate paint layers or varnish.
Safe Wet Cleaning Methods for Surface Grime
Photo: Alina Rossoshanska / Pexels
After thoroughly dry cleaning, if surface grime persists, you can consider very gentle wet cleaning methods. This stage requires even greater caution and a clear understanding of the risks involved. The primary goal is to remove accumulated dirt and pollutants from the varnish layer without affecting the paint beneath. Before applying any liquid, always, always, perform a spot test on an inconspicuous area, such as a corner or along the very edge where the painting meets the frame. Apply a tiny amount of your chosen solution with a cotton swab and observe for any adverse reactions: color lifting, stickiness, or dulling of the varnish. If you see any changes, stop immediately.
For general surface grime, distilled water is often the safest starting point. Use sterile cotton swabs, slightly dampened with distilled water. Work in small, controlled sections, rolling the swab over the surface rather than scrubbing. As the swab picks up dirt, discard it and use a fresh one. Never re-use a dirty swab, as this will only spread the grime. After cleaning a small area, immediately follow with another clean, distilled water-dampened swab to rinse the area, removing any residue. This two-step process (clean, then rinse) is vital. For more stubborn grime, some art conservators cautiously use a very dilute solution of mild, pH-neutral soap (such as Orvus WA paste, which is designed for textile and art conservation) mixed with distilled water. The concentration should be extremely low – often less than 1%. Again, thorough rinsing with plain distilled water is critical to ensure no soap residue remains, which could attract future dirt or yellow over time. This process is about delicate lifting, not aggressive scrubbing. Always ensure adequate ventilation and wear gloves to protect both your hands and the artwork from skin oils. For further cleaning insights, consider consulting resources on advanced art restoration techniques.
Advanced Considerations and Common Mistakes to Avoid
Photo: Huy Nguyễn / Pexels
When considering how to clean oil paintings, it's equally important to know what *not* to do. Many well-intentioned efforts lead to irreversible damage. Here are crucial advanced considerations and common mistakes to absolutely avoid:
* **Never use household cleaners:** Products like Windex, furniture polish, or abrasive kitchen cleaners contain chemicals that are far too harsh for delicate oil paint and varnish. They can strip varnish, dissolve paint, or leave behind damaging residues.
* **Avoid saliva:** While some old wives' tales suggest saliva for cleaning, its enzymatic composition and bacterial content can be unpredictable and harmful to artworks over time.
* **Don't use solvents unless professional:** Turpentine, mineral spirits, or alcohol-based cleaners are for varnish removal, not general cleaning. This is a highly specialized task that requires an expert conservator to avoid dissolving the actual paint layers.
* **Do not scrub or apply pressure:** Oil paint can be brittle, especially on older works. Scrubbing or applying force can cause paint to flake, crack, or detach from the canvas.
* **Avoid excessive moisture:** Water, especially tap water with its minerals, can cause swelling, staining, or even mold growth if not carefully controlled and thoroughly dried. Distilled water is always preferred.
* **Never clean a flaking or unstable painting:** Any sign of paint lifting or cracking means the painting is too fragile for cleaning. Seek professional help immediately.
* **Don't attempt varnish removal yourself:** This is the most complex and risky aspect of oil painting restoration. It requires specific solvents, precise control, and in-depth knowledge of paint chemistry. A wrong move can destroy the artwork.
* **Be wary of 'restoration' kits:** Many commercially available kits promise easy cleaning or restoration, but they often contain harsh chemicals or abrasive materials unsuitable for valuable artworks.
* **Consider the painting's age and value:** The older and more valuable a painting, the higher the imperative to consult a professional. The risk of amateur cleaning far outweighs the potential savings.
By understanding these pitfalls and exercising extreme caution, you significantly reduce the risk of damaging your precious artworks. When in doubt, always err on the side of caution and consult a professional art conservator.
Comparison
Feature
Professional Conservator
DIY Dry Cleaning
DIY Wet Cleaning (Distilled Water)
DIY Wet Cleaning (Household Products)
Safety for Valuable Art
Highest
High
Medium-High
Extremely Low
Effectiveness for Varnish Removal
Yes
No
No
Potentially Destructive
Effectiveness for Surface Grime
Highest
Good
Good
Variable/Harmful
Risk of Damage
Lowest
Low
Medium
Highest
What Readers Say
★★★★★
"This guide on how to clean oil paintings was incredibly thorough. I used the dry cleaning method on my grandmother's old portrait, and it looks so much brighter without any risk. The step-by-step instructions made me feel confident."
Eleanor Vance · Boston, MA
★★★★★
"I was hesitant to touch my antique landscape painting, but after reading the section on assessment, I realized it only needed light dusting. The detailed warnings about what not to do were particularly helpful, preventing me from making a big mistake."
Marcus Chen · Los Angeles, CA
★★★★★
"Following the distilled water method for surface grime, my oil painting from the 1950s regained its luster. The colors are noticeably more vibrant, and the dull film is gone. It truly looks like a new piece."
Sarah Jenkins · Austin, TX
★★★★★
"The guide is excellent for understanding the basics of how to clean oil paintings. I tried the dry cleaning tips and they worked well. I appreciate the emphasis on when to call a professional; it stopped me from attempting anything beyond my skill level on a more delicate piece."
David Ramirez · Chicago, IL
★★★★★
"As an amateur artist, this article gave me invaluable insight into the care of oil paintings, not just cleaning. Understanding the layers and the risks involved will certainly help me better protect my own works and those I collect."
Olivia Parker · Seattle, WA
Frequently Asked Questions
What is the safest way to clean a very old oil painting?
For very old or valuable oil paintings, the safest approach is minimal dry cleaning (gentle dusting) followed by immediate consultation with a professional art conservator. Their expertise is crucial for assessing delicate paint layers, old varnishes, and potential structural issues that amateur cleaning could exacerbate, leading to irreversible damage.
Can I use Windex or other glass cleaners on an oil painting?
Absolutely not. Windex and other household glass cleaners contain ammonia and other harsh chemicals that can severely damage oil paint, dissolve varnish, cause discoloration, or leave behind residues that attract dirt and degrade the artwork over time. These products are entirely unsuitable for art conservation.
How do I remove a yellowed varnish from an oil painting?
Removing yellowed varnish is a highly specialized restoration process that should only be performed by a trained professional art conservator. It involves using specific solvents tailored to the varnish type and age, and improper removal can strip away the paint layers beneath, causing irreparable harm to the artwork.
How much does professional oil painting cleaning cost?
The cost of professional oil painting cleaning varies significantly based on the painting's size, condition, complexity of the damage, and the conservator's reputation. Simple surface cleaning might range from a few hundred dollars, while extensive varnish removal and restoration could cost thousands. Always get a detailed quote.
Is cleaning an oil painting with a potato or bread safe?
While anecdotal evidence suggests using half a potato or a piece of bread to lift grime, these methods are generally not recommended by conservators. They can leave behind organic residues that promote mold growth, attract pests, or cause staining over time, posing long-term risks to the artwork.
Who should clean their own oil paintings?
Only individuals with a very basic understanding of art care and a painting of relatively low monetary or sentimental value should attempt simple dry cleaning (dusting) themselves. For anything beyond superficial dust, or for any valuable or fragile artwork, professional conservators are the appropriate choice to ensure safety and preservation.
What are the risks of cleaning an oil painting incorrectly?
Incorrect cleaning can lead to a multitude of risks, including paint loss, abrasion, discoloration, dissolving of the original varnish or paint layers, staining, introduction of harmful residues, and even promoting mold or mildew growth. These damages are often irreversible and can significantly diminish the painting's aesthetic and monetary value.
Are there new technologies for cleaning oil paintings?
Yes, art conservation is an evolving field. Modern techniques include using specialized gels, enzyme solutions, and even laser cleaning for highly specific and delicate dirt or varnish removal. These advanced methods require sophisticated equipment and extensive training, underscoring the need for professional conservators in complex cases.
Mastering how to clean oil paintings is a delicate art that requires patience, knowledge, and respect for the artwork's integrity. By following these expert guidelines, you can safely preserve and enhance the beauty of your cherished pieces. Remember, when in doubt, always consult a professional conservator to ensure the longevity of your valuable art.

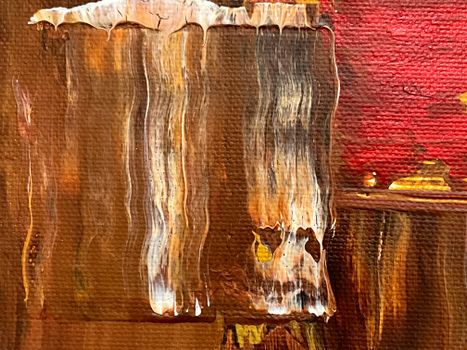 Photo: Steve A Johnson / Pexels
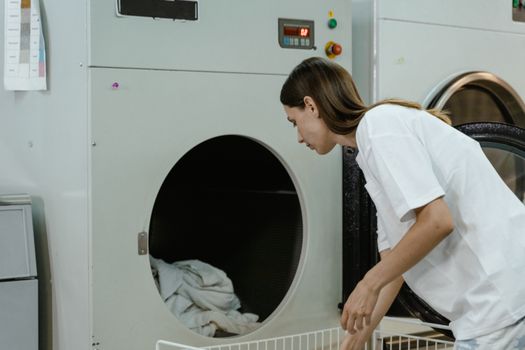 Photo: Tima Miroshnichenko / Pexels
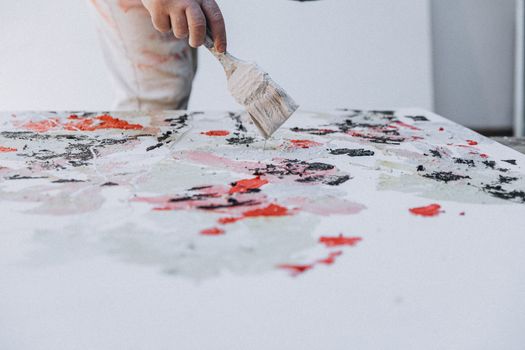 Photo: Alina Rossoshanska / Pexels
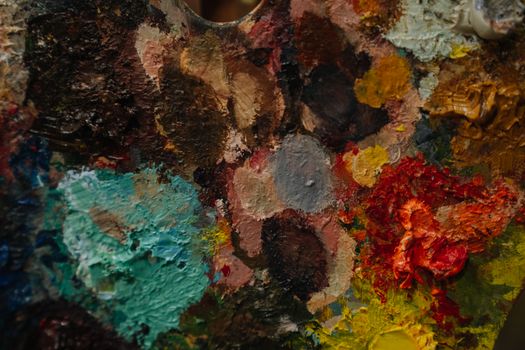 Photo: Huy Nguyễn / Pexels